Hydraulic Oil Storage for Spokane & North Idaho Shops: Keep Fluids Clean and Equipment Running
Clean oil is cheap insurance. In this post we walk through simple habits that protect your hydraulic oils, gear lubes, and greases: labeling every drum and tote, using the right pumps and transfer containers, and keeping moisture and metal shavings out of your system. We also explain how color-coding and point-of-use filters can cut cross-contamination in busy Spokane and North Idaho shops, extending component life while keeping your crews working instead of chasing leaks and failures.
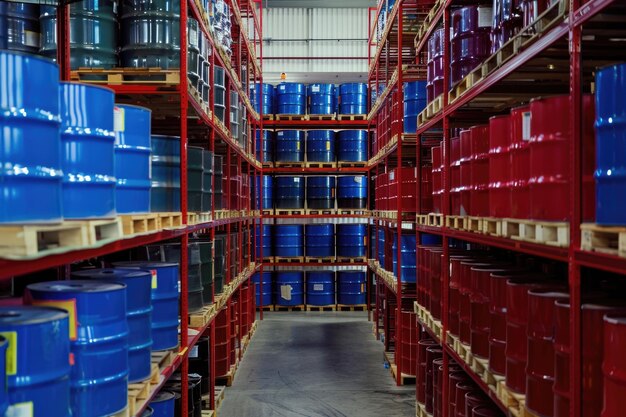
Why Storage Matters More Than the Logo on the Pail
Many shops in Spokane and North Idaho are willing to pay extra for a premium hydraulic oil, then leave drums sitting uncapped in a dusty corner of the yard. The result is the same as using bargain-bin fluid: dirt, water and air start degrading additives long before the oil reaches a pump. A smart storage plan protects your investment and gives you a repeatable way to keep every system running on clean fluid.
Good storage also saves time. When products are clearly labeled and organized, new technicians can grab the right oil without hunting for part numbers or guessing based on the color of the drum. Less confusion in the lube room means fewer misfills, fewer callbacks and more hours spent on productive work instead of rework.

Choose the Right Home for Every Product
Start by mapping where each lubricant lives today: hydraulic oils, gear lubes, engine oils, DEF and greases. Whenever possible, store them indoors to avoid direct sun and wide temperature swings. Indoors storage reduces condensation, protects labels and makes it easier to inspect containers during normal walk-throughs.
If space or layout forces you to keep some totes and drums outside, raise them off the ground, shield them from rain and snow, and keep bungs pointed horizontally or slightly downward so water cannot pool around openings. A simple pallet rack or covered stand is often enough to keep containers clean and accessible without major construction.
Label Everything People Touch
Every drum, tote and bulk tank should answer three questions at a glance: what is inside, where it goes, and when it arrived. At minimum, include the product name, viscosity grade, application notes (for example, “ISO 46 hydraulic oil – excavators and skid steers”) and delivery date.
Color-coding makes this even easier. Choose one color family for hydraulic oils, another for gear lubes and another for engine oils. Repeat those same colors on your equipment fill points with tags or decals. When a mechanic is topping off a machine in low light or bad weather, matching colors provide an instant cross-check before any fluid leaves the nozzle.
Use Dedicated Pumps and Transfer Containers
The fastest way to contaminate good oil is to move it with dirty tools. Assign each major product its own pump, hose and nozzle, and do not swap them between different fluids just because it seems convenient in the moment. When a pump shares duty between products, you can easily drag residues and incompatible additives into expensive systems.
For shop work, store hand pumps and hoses with dust caps or splash guards on the ends so they are not lying on the floor between jobs. For field work, replace open buckets and coffee cans with closed transfer containers that have screw-on lids and narrow spouts. Clearly label each container with the same product name and color code that appears in your lube room so people know exactly what they are carrying out to the yard.

Keep Water and Air Out Before They Become a Problem
Hydraulic fluids are extremely sensitive to water. Each time a warm drum cools overnight, moist air can be drawn in and condense on the inside walls, eventually running down into the oil. You can slow this process by using drum vents with desiccant breathers, by keeping partially used drums indoors and by avoiding unnecessary temperature swings.
On bulk tanks, use breather caps with fine filtration to let air move without inviting dust. Check breathers during scheduled PMs and replace them when they darken or clog. Adding a sight-glass or a low drain point makes it easy to check for water and sludge so you can remove contamination before it reaches pumps, valves and cylinders in the field.
Design the Lube Room Around Real Workflows
A well-designed lube room saves steps on every shift. Keep high-use products close to the door and to the waste-oil collection point. Group compatible products together so technicians are not walking laps around the shop for a routine top-off. Leave enough room around drums and totes for carts or pallet jacks so you can rotate stock without climbing over obstacles.
Good lighting, clear signage and a simple whiteboard checklist go a long way. When everyone can see which deliveries arrived, which drums are nearly empty and which filters are due to be changed, there is less guesswork and less temptation to “make do” with the wrong product in a hurry.
Train the Team and Watch the Results
The best storage setup still depends on people using it consistently. Take time to walk your crew through the lube area and explain why each rule exists: why funnels are capped, why mystery pails are not allowed in bulk tanks, and why partial drums are dated and used first. Add those points to onboarding checklists so new hires learn the same habits from day one.
Finally, track a few simple indicators: premature hose failures, valve sticking, or abnormal lab reports from oil samples. When those numbers move in the right direction and your machines spend more time working than waiting for parts, you will see that your investment in storage habits is paying off. Clean oil may be “cheap insurance,” but a clean storage system is what lets that insurance really do its job.